
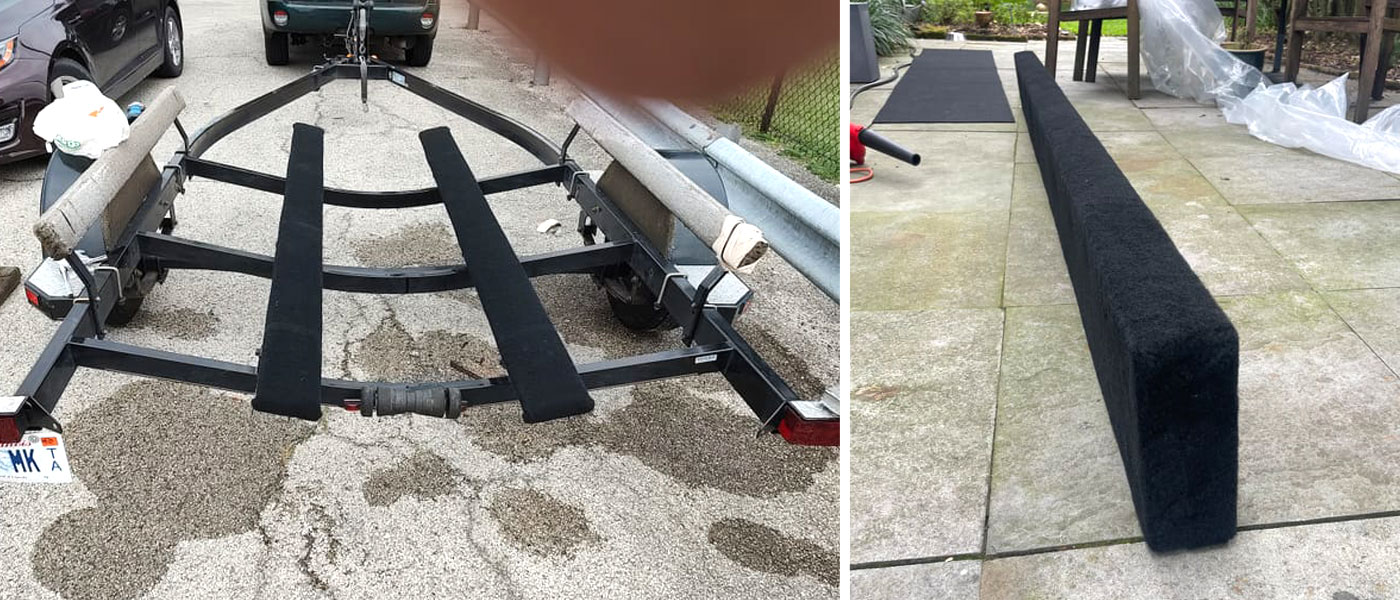
At BoatCarpet.com, we know you want your boat to look great while also saving money. That’s why we offer high-quality carpet specifically designed for boat trailer bunk boards. Whether you’re looking for pre-carpeted bunk boards or prefer a DIY approach, we’ve got you covered! If you’re ready to tackle the installation yourself, follow this step-by-step guide to replacing your boat trailer bunk carpet like a pro.
Before you begin, you’ll need to purchase replacement bunk carpet. It’s essential to use carpet specifically made for boat trailer bunks rather than standard boat carpet. Why? Because bunk carpet is designed to protect your boat’s hull with a dense, felt-like material and a strong, water-resistant backing. This specialized carpet resists tearing, abrasion, and water penetration, helping extend the life of your bunk boards.
Pro Tip: Avoid using regular boat carpet—it won’t provide the same level of protection and durability for your trailer bunks.
When selecting the right length of carpet, be sure to factor in extra material to wrap over both ends of each board. You’ll be folding the carpet over the ends using a “gift wrap” style, so include the board height and the amount needed to wrap around the bottom in your measurements.
Step 2: Gather Your Supplies
To complete the job efficiently, have these tools and materials on hand:
- Staple gun with 1/2” stainless steel staples
- Measuring tape
- Heavy-duty scissors
- Drill with a 9/64” bit
- Silicone sealant
- Socket wrench set
- Saw (if cutting new boards)
- Sharpie marker
- New lag screws and washers (typically 1 1/2” x 5/16” for 2” boards)
Optional: If you’re using new boards, consider sealing them with a wood sealant. However, if you plan to use adhesive (which we don’t recommend), keep in mind that most adhesives won’t stick well to a sealed surface. Staples are the preferred method for securing the carpet since they make future replacements much easier.
Step 3: Cut & Prepare the Boards
If you’re reusing your existing boards, you can skip this step. Otherwise, measure and cut new bunk boards from durable, water-resistant wood such as redwood, southern yellow pine, or Douglas fir. If you’ve applied a sealant, allow the boards to dry completely before attaching the carpet.
Step 4: Wrap & Attach the Carpet
- Position the carpet under the board, leaving enough extra material to fold over the ends.
- Wrap the ends using a “gift wrap” style fold, ensuring a snug fit.
- Secure the carpet with stainless steel staples along the bottom of the board.
- Mark the holes for reinstallation using a Sharpie, using your old boards as a guide.
Step 5: Drill & Install the Boards
- Using a 9/64” drill bit, drill pilot holes into the back of the board—do not drill all the way through. This keeps the top of your carpet smooth.
- Apply a small amount of silicone sealant into each hole to help prevent water intrusion.
- Position the bunk board onto the trailer’s brackets.
- Secure the board in place using lag screws and washers.
Step 6: Enjoy Your Newly Carpeted Bunk Boards!
That’s it! You’ve successfully installed fresh carpet on your boat trailer bunk boards. With this new upgrade, your trailer is now better equipped to protect your boat’s hull while providing long-lasting durability.
For top-quality boat carpet, pre-carpeted bunk boards, and more DIY marine flooring solutions, visit BoatCarpet.com!

